© All rights reserved, Thorsten Kraska, 2010I found the recipe for Torta di Fregoloti a while ago and forget about it. I rediscovered it in a food journal lately and found the idea interesting not only to use almonds as in many other recipes for Torta di Fregoloti but also more of it. That makes the cake or pie much more nuttily. Instead of just using almonds I used hazelnuts and walnuts along with the almonds. So maybe this is not a Torta di Fregoloti as you know it or as it is written down in the books, but I tried to catch the idea of it and to make it my own.
In German one could call it a 'Streuselkuchen mit Nüssen' and in English I would translate it as crumble cake or pie with nuts. The cake is based on a very simple shortcrust cake (Mürbeteig). It makes for a dry crumble cake. Instead of cutting it into pieces everyone is breaking off a piece of the Torta di Fregoloti. Serve it with a good cup of coffee (or red wine). Kids will like it with a glass of milk or a cup of cocoa.
Torta di Fregoloti(makes one cake of 24 cm)250 g all-purpose flour
150 g sugar
70 g almonds (coarsly chopped)
70 g walnuts (coarsly chopped)
70 g hazelnuts (coarsly chopped)
1 teaspoon baking powder
1 pinch salt
200 g unsalted butter (cold)
2 tablespoons Brandy (you can omit the Brandy, if you bake for kids)
Topping: powder sugar
Preaheat the oven to 200 C. Grease a spring form of 24 cm in diameter (you could also use one of 20 cm, but the cake will be higher and baking time longer). Chop the almonds, hazelnuts and walnuts as coarse as you want them. I like to have bigger pieces of them in the cake. Mix the nuts with flour, sugar, baking powder and salt in a bowl. Add cold butter (cut into chunks) and brandy and using your hand form a crumbly dough. DO not over-knead it with your hand. The dough should be crumby. Fill dough into baking form and bake for about 25 minutes until cake is golden.
Let cool cake completely on cooling rack. Then dust generousely with powder sugar. Serve cake as it is and invite everyone to break off pieces of the cake to enjoy with coffee, red wine, milk, cacao or whatever you want.
One remark on greasing the form. I do not use butter. I line out the form with a large piece of baking paper in a way that the paper looks over the rim of the form. In that way you will get the cake out easily and you can use the paper to wrap the cake into it. It looks very rustic and it is great way to take it with you for a picnic.
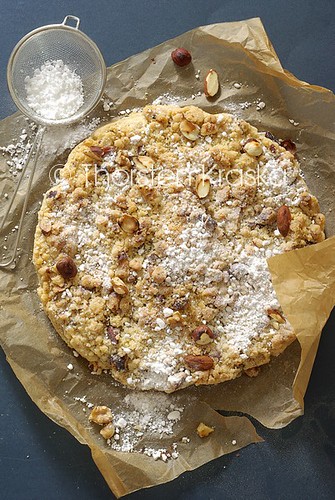
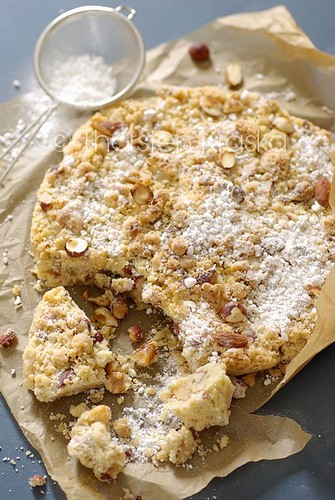
© All rights reserved, Thorsten Kraska, 2010About the photosI started with a view from above to show the crumbly top of the cake (2nd photo). Instead of dusting it with powder sugar through as sieve (as shown in the photo) I use the powder sugar directly because the sieved sugar wasn't good to see in the photo. By that I found out that I like it that way even more. Because of the sugar the nuts weren't that visible and so I added some roasted one for the styling on the cake and some beside. I already started to get a more casual look by having some of the sugar on the baking paper, but still have a more clean look. The lighting was simple. Natural light from a window and just a very slight fill from lower right (2nd photo). The structural composition is made by two circles and by a square (paper). The cake is almost centered to make for a very balanced shot. The one side of the paper is overlapping the cake to get more tension into the composition. The color scheme is based on a warm (brown of cake, paper) and cold (dark blue-grey of the background) contrast. Beside the sieve I didn't use proppings to keep the attention on the textures and structures of the cake. I used a 50mm lens at f=11.
Although the photo shows the cake well I though it was a bit too clean and not casual and messy enough. So I go for a messy setting as shown in the 1st photo. Basically it is the same concept as in the 2nd photo. I go closer and used a slightly leveled angle with a 70mm lens at f=4.0. The lower angle and closer setting is getting the focus on the break up of the cake. With a more shallow depth of field I add some dimension to the composition by not having the whole cake in focus now. But you can still see the textures of it. The break up of the cake add just the messyness I wanted to have for it. The lighting wasn't changed except that I used a fill light from lower left to get more light on the 'inside' of the cake. I didn't use a bounce on right side here. Iwanted to have some shadows here.